There’s thrill in giving your car a bold new look with your own hands—discovering carbon fiber vinyl wrap revealed the perfect blend of high-end style and hands-on creativity. If you enjoy DIY car projects and want that eye-catching weave without real carbon fiber’s cost, this Carbon Fiber Vinyl Wrap Guide for DIY Car Lovers is for you. It covers why this wrap is a DIY favorite (lightweight, reversible, smart choice), how to pick the right type/finish, essential tools, and the critical importance of surface prep (a flawless wrap starts before the first sheet).
The guide provides detailed installation instructions for curves and edges and difficult areas while showing you how to prevent common mistakes that cause air bubbles and uneven stretching to save time and materials. The guide provides essential information about post-project maintenance to preserve the wrap’s appearance while offering practical advice for cutting and trimming the material and protecting paint surfaces and maintaining straight lines. The guide helps you decide between doing the job yourself and hiring a professional while showing you how to create unique designs for your vehicle’s interior and spoilers and accent areas. The guide shows you that with proper knowledge and sufficient time you can transform your vehicle into a show-stopping masterpiece through your own efforts.

1. What Is Carbon Fiber Vinyl Wrap and Why DIYers Love It
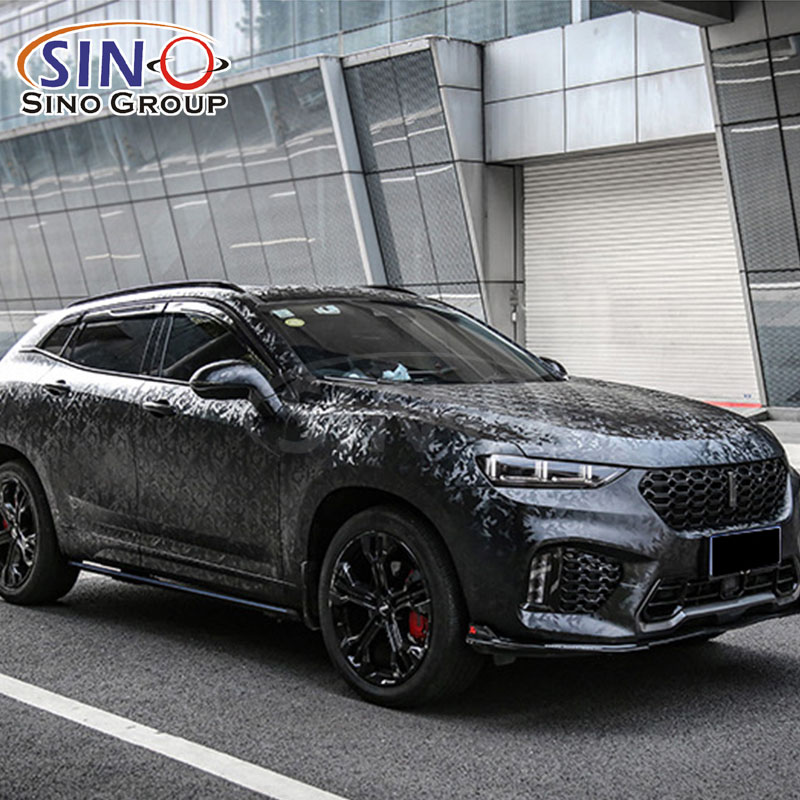
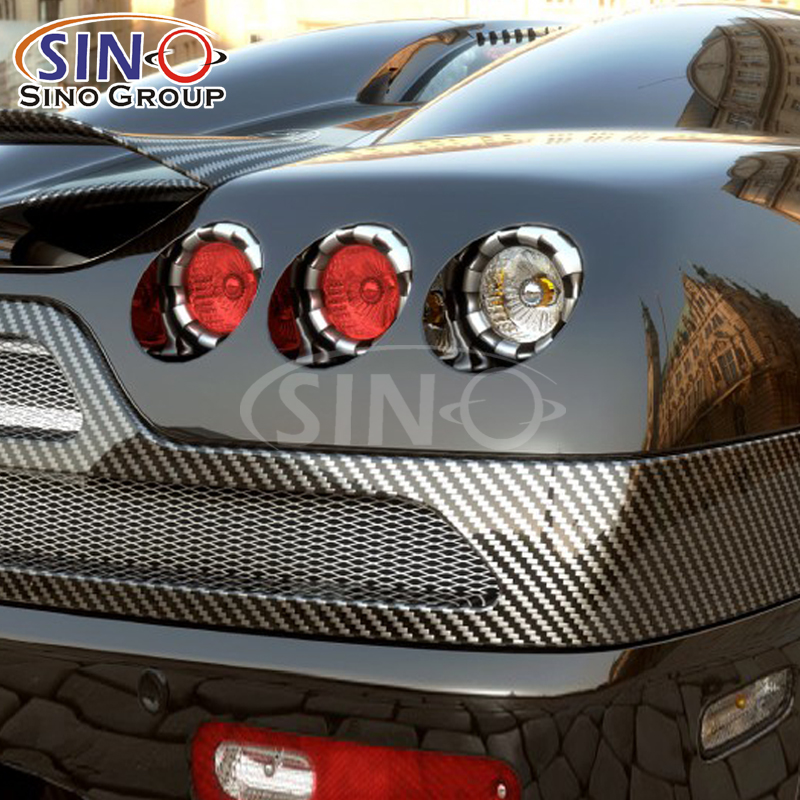
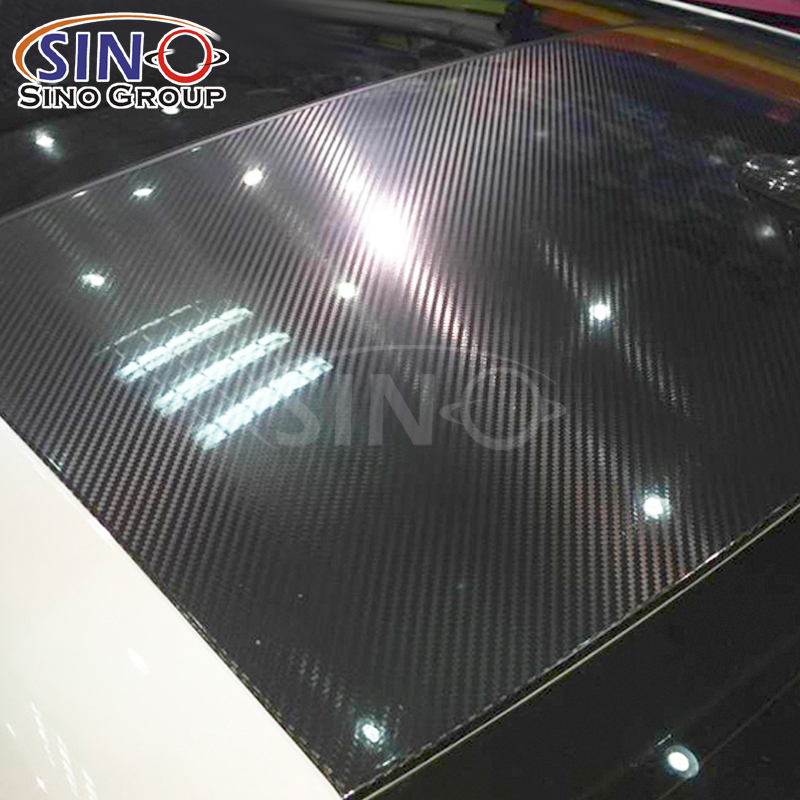
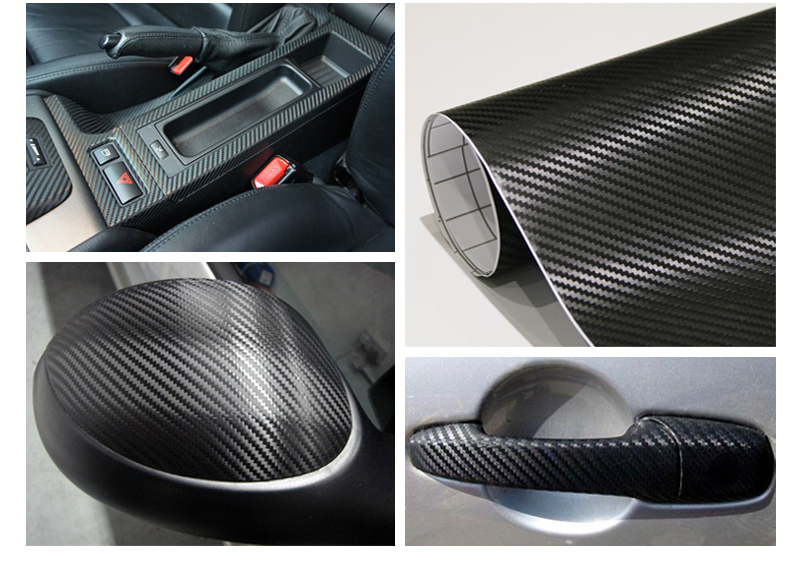
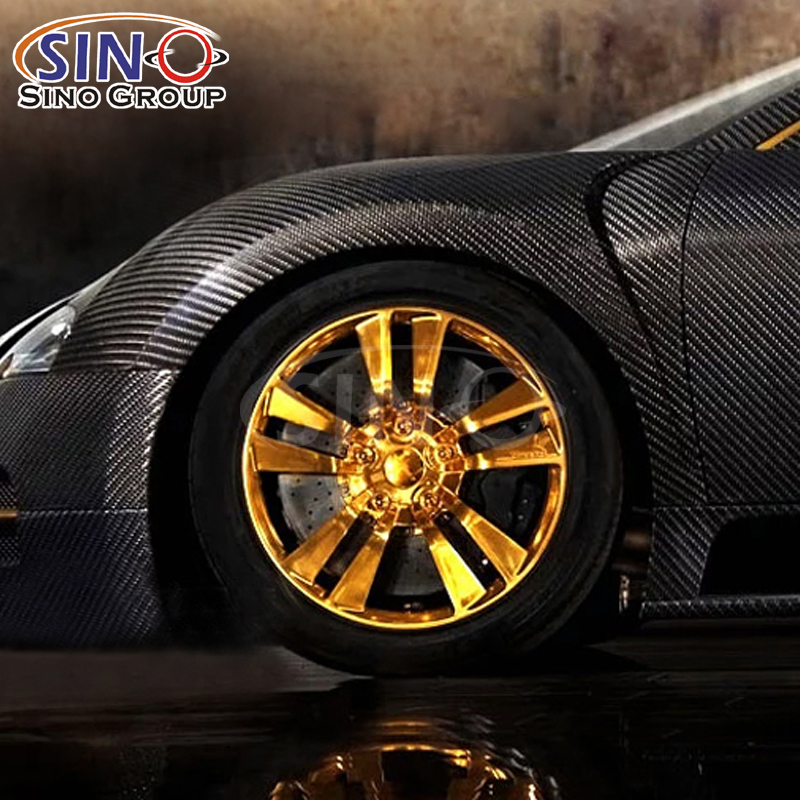
The flexible adhesive film known as carbon fiber vinyl wrap duplicates the woven pattern which appears on actual carbon fiber materials. The first time I saw carbon fiber vinyl wrap was when my friend applied it to his performance car and I fell in love with its motorsport appearance that did not require any permanent modifications. Unlike painting, carbon fiber vinyl wrap lets me switch up the look anytime, and I don’t have to strip or sand original paint. It protects the underlying surface from small scratches and UV fading, which means I get style plus a bit of armor for my car’s body. DIYers gravitate toward it because it requires no special certification to apply, and I can work at my own pace in my garage. The material comes in large rolls or sheets, so I can cover big panels like hoods, roofs, mirrors, or even smaller accents. It feels empowering to hold a roll of this high-tech film and know I can reshape a vehicle’s appearance myself. Plus, the cost is far lower than real carbon fiber parts or a custom paint job, letting me experiment with multiple designs without breaking the bank
The DIY community chooses this material because it does not need any certification for application and I can perform the work at my own speed in my garage. The material exists in big rolls and sheets which allows me to protect extensive panels including hoods and roofs and mirrors and smaller decorative elements. The ability to purchase this advanced film in rolls gives me the power to transform my vehicle’s appearance through personal work in my garage. The affordable price of this material allows me to test different designs because it costs significantly less than buying actual carbon fiber components or hiring a professional for painting.
2. Choosing the Right Carbon Fiber Vinyl Wrap for Your Project
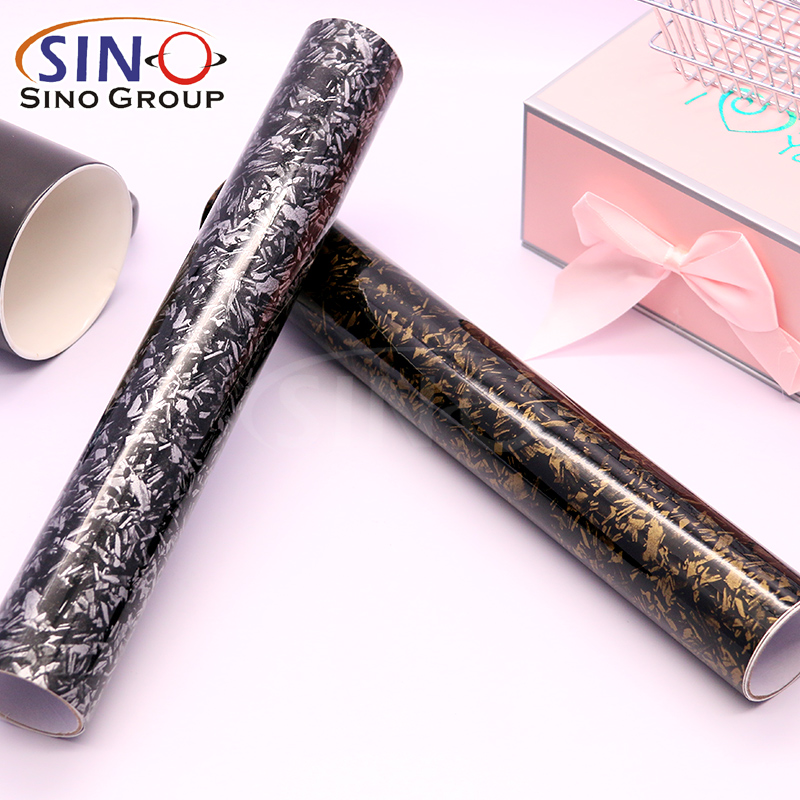
Picking the right carbon fiber vinyl wrap shapes the entire outcome, so I never rush this step. I check three key factors: pattern size, finish, and quality grade. The size of woven patterns determines their visual scale because large patterns work best for big panels like hoods and small weaves suit confined areas like interior trim. I select finish types from matte to gloss to satin based on the desired aesthetic effect because matte creates a hidden look while gloss adds brightness and satin finds a middle ground. Quality matters because cheap wrap may lift, fade, or stretch poorly. I look for brands that list durability, UV resistance, and ease of repositioning during install. Some wraps come with air release channels that help me push out bubbles, and I always test a small piece first to judge stiffness and stretch. Matching the wrap to my car’s contours and color scheme helps the final look feel intentional rather than slapped on. Taking time here saves frustration later.
3. Tools You Need to Apply Carbon Fiber Vinyl Wrap Successfully
I start by collecting all necessary tools which will help me achieve both accuracy and speed in my work. The essential tools for my work include a soft microfiber cloth for cleaning and isopropyl alcohol for residue removal and a plastic squeegee for applying the wrap to curved areas without damage. The work requires a utility knife with new blades for clean cuts and I store additional blades because worn-out blades tend to damage the film. The process requires heat application through a heat gun to soften vinyl material for better moldability. The ruler and measuring tape help me achieve precise cuts while masking tape hinges enable me to place the wrap correctly before making the final application. The gloves I wear stop my hand oils from contaminating the adhesive surface.
4. Preparing Your Car Surface Before Applying Carbon Fiber Vinyl Wrap
The foundation of an excellent wrap depends on having a surface that is completely ready for application. I start by washing the entire area to eliminate dirt before using isopropyl alcohol to eliminate all surface oils and wax and hidden contaminants. I begin by treating all areas with old adhesive residue and rust spots because these imperfections will affect the appearance of the wrap. I work best in temperatures between 65–75°F (18–24°C) because cold vinyl becomes rigid while hot vinyl becomes excessively sticky. The adhesive in vinyl products activates prematurely when exposed to direct sunlight. The process requires patience because a well-prepared surface enables the carbon fiber vinyl to attach perfectly and maintain its quality throughout time. The process of preparing the surface requires patience.

5. Step-by-Step Process to Install Carbon Fiber Vinyl Wrap
I break the installation into manageable steps so I stay in control. First, I measure and cut the wrap slightly larger than the panel. I spray a mix of water and dish soap on the adhesive side — this lets me slide the wrap into position before sticking. I place it carefully, using a hinge method to align one edge, then slowly lower the rest while smoothing from the center outward with my squeegee. I use heat to shape the vinyl when I encounter curved or recessed areas before I use my squeegee to push it into all the grooves. I place the vinyl in its correct position before using my squeegee to remove water and air bubbles while maintaining a steady pace to prevent edge lifting. I finish the process by cutting away excess material with my knife while also hiding edges beneath trim pieces when feasible. I repeat for each section, checking that patterns align for a seamless look. Rushing this stage risks misalignment, so I keep my pace steady and patient.
6. Common Mistakes to Avoid When Using Carbon Fiber Vinyl Wrap
I made some of these errors early on, and I pass along the lessons so you skip them. One big mistake is stretching the vinyl too much, which thins the pattern and creates uneven texture. Another is applying without enough heat on curved areas, leaving wrinkles that refuse to smooth out. I used to ignore surface prep, and dust trapped underneath forced me to redo sections. I also learned not to yank the backing off too quickly, as that can shift the wrap before I position it. Overworking the squeegee causes scratches, and removing the wrap in cold weather can crack the adhesive. Recognizing these pitfalls before I start helps me stay focused and produce cleaner results. Every mistake I avoid saves time and keeps my enthusiasm high.


7. How to Cut and Trim Carbon Fiber Vinyl Wrap Neatly
Cutting precisely defines the professionalism of the finished job. I perform two measurements before using a pencil to mark the area when necessary. I maintain a small amount of excess material during edge and panel gap trimming before using tucking and cutting techniques to achieve perfect alignment.I use my ruler to act as a straightedge which helps me guide my knife during flat surface work while I maintain a soft blade position to prevent paint damage.
I finish curved perimeter cuts by performing several shallow passes instead of attempting a single deep cut.. The process of heating the vinyl material enables me to steer through narrow bends without causing it to break. I remove all cut pieces from the surface before applying additional pressure to the edge for better adhesion.
8. Maintaining and Caring for Your Carbon Fiber Vinyl Wrap
After my car receives its carbon fiber vinyl wrap I intend for it to remain eye-catching. I clean it frequently using a pH- car shampoo and a gentle mitt steering clear of harsh brushes that might damage the finish. I avoid using chemicals or polishes with petroleum distillates because they can degrade the adhesive gradually.If I notice contaminants like tree sap or bug splatter, I remove them gently with a dedicated cleaner and a microfiber cloth. For protection, I apply a sealant formulated for vinyl wraps; this boosts UV resistance and makes future washes easier. The wrap’s color remains intact when you park in shaded areas or use a car cover to protect it from premature aging. The wrap maintains its fresh appearance through basic maintenance which leads to a significant increase in its lifespan.
=
9. Cost vs. Value: Is Carbon Fiber Vinyl Wrap Worth It for DIYers?
I weighed the numbers early in my journey. Professional installation of real carbon fiber parts or a painted carbon effect can run thousands of dollars. High-quality carbon fiber vinyl wrap costs a fraction of that, especially when I buy in bulk for multiple projects. Doing the work myself eliminates labor charges, and if I ever tire of the look, I can remove the wrap without harming the paint. The value isn’t just financial — I gain skills and satisfaction that enhance my connection to my car. I can change styles for different seasons or events, which you can’t easily do with paint. Considering the low entry cost, minimal risk, and huge visual impact, I decided carbon fiber vinyl wrap was easily worth it for a DIYer who loves customizing vehicles.

10. Creative Ways to Use Carbon Fiber Vinyl Wrap Beyond Exteriors
While exteriors grab attention, I found immense fun in wrapping interior bits too. I’ve applied carbon fiber vinyl wrap to dashboard trims, center consoles, door handles, and speaker grilles, creating a cohesive race-inspired cabin. It works wonders on spoiler lips, mirror caps, and emblem surrounds, highlighting details without permanent modification. I even wrapped small accessories like phone mounts or laptop covers when I wanted a matching aesthetic off the road. The material molds well to many textures, so I experiment with trim rings, vent surrounds, and gauge clusters. This flexibility fuels creativity, and each addition deepens the personal statement I make with my car. Seeing familiar surfaces reborn in carbon fiber excites me every time I open the door.

Conclusion:
The DIY project of applying carbon fiber vinyl wrap to my car brought me immense satisfaction because it allowed me to create a new vehicle appearance while acquiring a skill that I can reuse. The entire process from selecting materials and tools to surface preparation and careful installation and wrap maintenance helped me develop my skills and improve my workmanship. The carbon fiber vinyl wrap has evolved into my preferred styling solution because it provides an affordable way to customize my vehicle. The guide will lead you to a finished product that showcases your personal touch and automotive enthusiasm when you follow its instructions with confidence.Grab that roll, take your time, and enjoy the process — the road to a stunning carbon fiber finish starts with your first careful move.