Getting your car windows tinted isn’t just about aesthetics and privacy; it’s an investment in comfort and UV protection. However, the final result hinges entirely on a correct installation process. A professional-grade window tint job is a meticulous craft. Here’s a breakdown of the exact process and critical steps that ensure a flawless, bubble-free finish.

Phase 1: Preparation is Everything
The foundation of a perfect tint job is laid long before the film is even cut.

Phase 2: Cutting and Shaping the Film
This is where skill truly begins to show.

Phase 3: Application and Final Touches

Key Steps & Non-Negotiable (Precautions)
The 3 Pillars of a Flawless Install:
-
Deep Cleaning: Any remaining dirt is the primary cause of visible dust specks and bubbles. The surface must be immaculate.
-
Heat Shrinking: This step separates amateurs from professionals. It is essential for getting the film to lie perfectly flat on complex curves without gaps or fingers.
-
Squeegee Technique: The skill and method used to remove the liquid determine whether the finish is crystal clear or streaked with residual water.
Vital Precautions for a Safe and Durable Result:
-
Safety First:
-
When cutting, always keep the blade angled toward the glass to avoid damaging the car’s paint or interior.
-
Keep the heat gun in constant motion. Focusing heat on a single spot can thermal shock and crack the glass.
-
Waterproofing electronics is not optional; it’s a fundamental requirement.
-
Professional Tools: The right tools are non-negotiable. This includes specialized knives, multiple squeegee types (hard for cleaning, soft for installing), spray bottles, and a quality heat gun.
-
Post-Installation Care (MUST FOLLOW!):
-
Do Not Roll Down Windows: The adhesive needs time to cure. Avoid rolling down windows for 3-5 days in summer and 7-10 days in winter to prevent peeling and shifting.
-
Normal Hazing: A hazy or bubbly appearance is normal for the first few days as the residual moisture evaporates. It will clear up completely.
-
Cleaning: Do not clean the inside of the windows for at least a week. After that, only use a soft cloth and ammonia-free cleaner, as harsh chemicals will damage the tint.
By understanding this detailed process, you can appreciate the artistry behind a professional window tint and ensure you get the high-quality, durable result you’re paying for.

Frequently Asked Questions (FAQ) About Window Tint Installation
1. How long does a full window tint installation take?
A professional installation for a standard sedan typically takes between 2 to 4 hours. More complex vehicles like SUVs or those requiring more precise work (e.g., a single-piece rear window) may take longer.
2. What should I look for when choosing a tint shop?
-
Clean, Indoor Facility: This is non-negotiable for a dust-free install.
-
Portfolio of Past Work: Look for consistent quality in their photos.
-
Quality of Materials: Ask what brands of film they use and choose one with high UV and IR rejection.
-
Warranty: A reputable shop will offer a warranty on both the film and their labor.
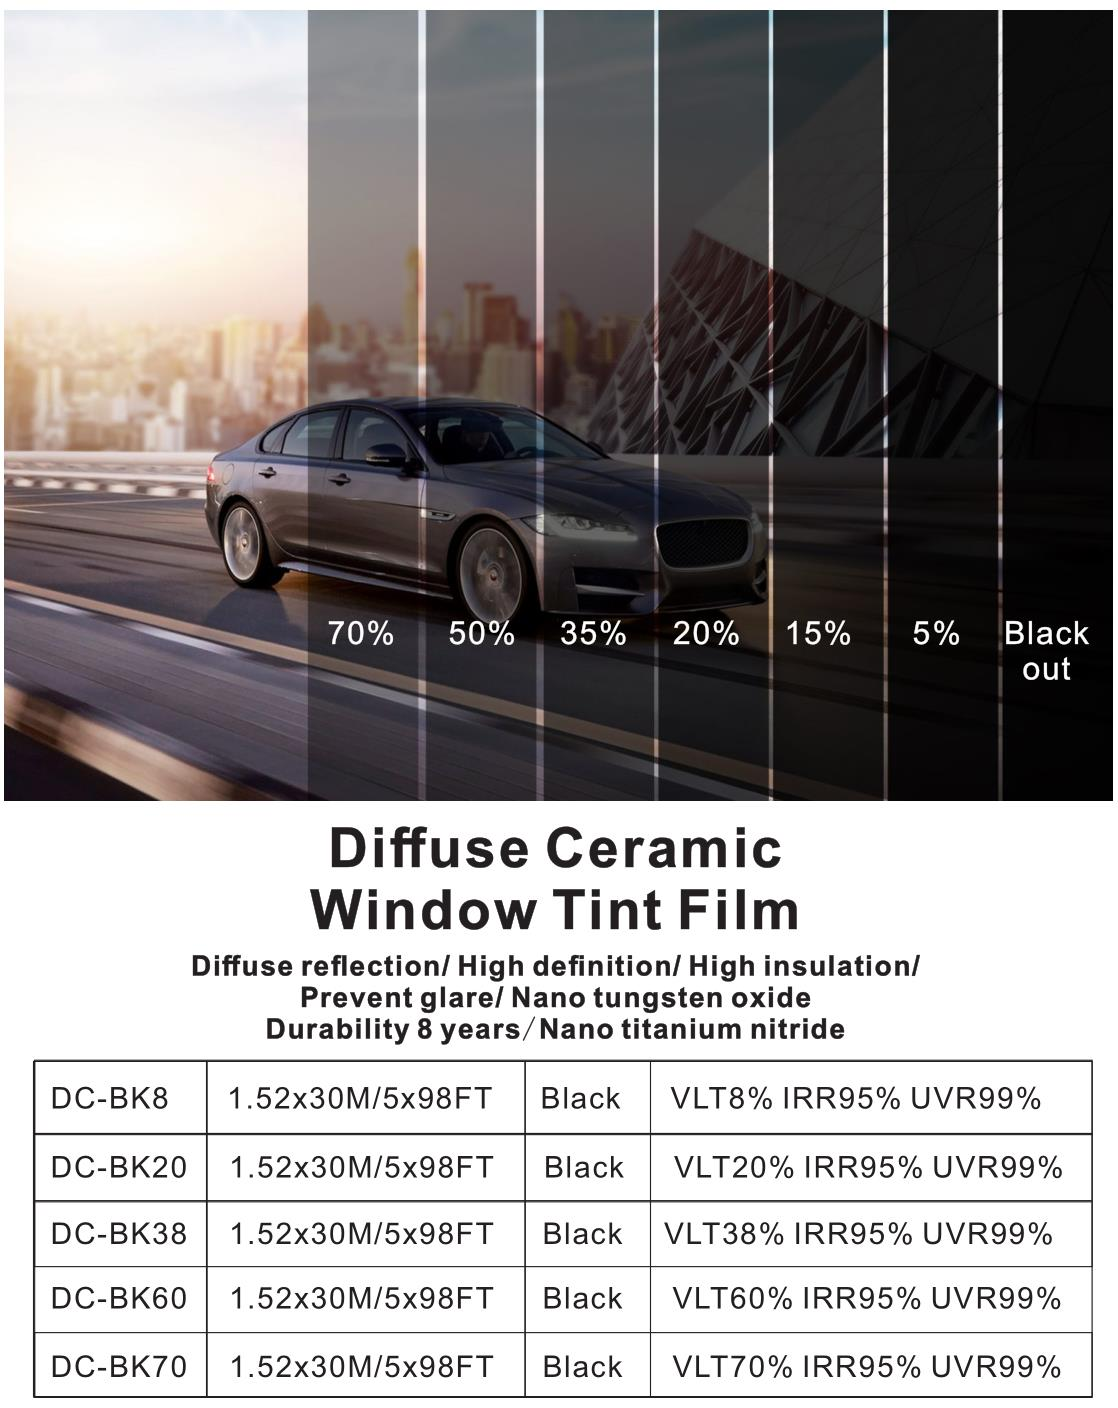
3. What do the terms VLT, IRR, and UVR mean?
-
VLT (Visible Light Transmittance): The percentage of visible light that passes through the film. A lower VLT means a darker tint.
-
IRR (Infrared Rejection): The percentage of heat (infrared rays) the film blocks. This is key for keeping your car cool.
-
UVR (Ultraviolet Rejection): The percentage of skin-damaging UV rays the film blocks. High-quality films block over 99%.